Northeast Coast Steamed Mussels

One of the best things about traveling is trying the food a region is known for. After spending the last two summers exploring the western U.S., where it’s all about beef and buffalo, this year Roy and I headed to the northeast. Above is Peggy’s Cove in Nova Scotia, Canada where fishing is still a common way of making a living. I sampled the first mussels of my trip here – they were part of a seafood chowder – and I was hooked.

Prospect, Nova Scotia where Roy’s grandma grew up is just down the road from Peggy’s Cove. Her father was a fisherman just like every other man that lived there. Today, it’s said there is only one fisherman left in the village.

Prince Edward Island, or PEI as the natives call it, is known for its blue mussels. Notice the dark colored buoys in the water? That’s a mussel farm. Baby mussels are put into a net that looks like a hanging sleeve and they happily eat and grow while being washed by the clear water. After a couple of years they are harvested. Living in their farm environment, they aren’t muddy or gritty and are very easy to cook and eat.

While in Canada, and then later in Maine and Massachusetts, we bought mussels at the grocery for two dollars and some cents a pound. Wow! Even in a motor home it was easy to cook up a mess of them. They are great as an appetizer or the main dish. The first time I made them, I used what I had on hand to add flavor to the broth. Traditionally, mussels are steamed with some white wine, but I found chicken broth was just as delicious – and I just kept making them that way! However, feel free to throw in 1/4 cup of white wine if you so desire!

Ingredients:

For every 2 pounds of mussels:

2 tablespoons butter

6 cloves garlic, finely minced or put through a press

1/2 cup chopped red onion

1/2 cup chopped fresh parsley

2 cups chicken broth (additional 1/4 cup white wine optional)

Rinse each mussel and check to make sure it is closed. If it closes up after you handle it, then it’s fine to use. But if it is cracked, open, or has an unpleasant odor, throw it out! In the several times I have made this dish, I always toss several.

If the mussel has a beard (a little string hang hanging out of the shell) gently tug it back and forth and pull it off.

Melt butter over medium low heat. Add onions and parsley and sauté until onions are just about to get tender. Add garlic and sauté 30 more seconds. Gently add mussels and carefully stir to cover them with the mixture. Turn heat up to high and pour in broth. Cover the pan and continue to cook on high for 5 minutes.

Take the cover off and give the mussels a stir. They should be open and look the the photo above. If some are still closed, put the cover back on and continue to cook on high for an additional two minutes. Throw out any mussels that are still closed after that.

Ladle the mussels and broth into serving bowls. Serve with melted butter to dip mussels in (honestly this broth is so good it isn’t needed!) and crusty bread to sop up the broth. Or serve the mussels and broth over cooked pasta. I’d love to hear if any one tries this. Feel free to email me at yatesyummies@gmail.com or make a comment below!


Save to Pinterest


San Francisco Salmon Salad

As part of our three and a half month motor home trip this summer, Roy and I took about four weeks to travel the western side of California from top to bottom. We loved it all -from the giant redwood trees to the southern beaches- but found San Francisco an especially fun experience. We actually stayed about an hour north, in Santa Rosa and used the Jeep we tow to explore the area. On the first full day, we went to Muir Woods and then decided to drive across the Golden Gate Bridge.  After the trill of arriving on the other side, we just kept on going. We ended up on the corner of Franklin and Oak where we saw a paid parking lot. We definitely weren’t in the touristy part; some of the buildings didn’t look too well kept, but there were plenty of people walking around and lots of cute looking restaurants. The parking lot attendant told us we had until 7 pm – that’s when he left – and he warned us that if he wasn’t around, when we returned to the car, the bikes we had attached to the back wouldn’t be around either. So we ducked into a place called RT Rotisserie, thinking it would be quick and easy enough to grab a bite to eat. It turned out the place was a spin off of another, fancier eatery called Rich Table – the kind of establishment where one must have a reservation. We lucked out because Roy had an absolutely delicious pork sandwich and I had one of the best salads of my life – and we made it back to the car on time!  I began duplicating the salad again and again; it’s lemony, crunchy and filled with colorful greens and herbs. RT Rotisserie only serves pork and chicken but topping this salad with a piece of salmon baked with a smear of the salad dressing makes it a meal. I hope you enjoy it as much as I do. If you would like a printable recipe, click on the recipe archive button at the bottom of the post.

Ingredients and Directions for Four Servings:

Suggestions for the greens:

5 oz. spring mix

5 oz. spinach leaves

1 cup washed,torn radicchio leaves

1/4 cup fresh dill, roughly chopped

1/4 cup fresh flat leaf parsley, roughly chopped

1/4 cup fresh mint roughly chopped

1 cucumber, sliced


Place all ingredients in a large bowl.


Suggestions for the crunch:

1/4 cup raw pepitas

1/4 cup raw sunflower seeds

2 tablespoons sesame seeds

2 tablespoons  black sesame seeds

12 radishes, washed and sliced


Set aside the crunchy things until time to assemble the salad.


Quick “pickled” red onion:

1 red onion

1 cup vinegar

1 cup water

1 teaspoon kosher salt

1 teaspoon sugar


Mix the vinegar, water, salt, and sugar together. Peel and thinly slice the onion. Pour vinegar mixture over the onion slices and let sit for at least 10 minutes. Set aside until time to assemble the salad.


For the dressing:

3/4 cup olive oil

1/4 cup plus 2 tablespoons fresh lemon juice

2 cloves garlic, finely minced or put through a press

2 tablespoons tahini (sesame paste)

1 teaspoon soy sauce (regular, low sodium, Tamari, or Maggi – your choice)

1/2 teaspoon kosher salt

1/4 teaspoon pepper


Whisk all ingredients together in a bowl. Place 1/2 cup of dressing in a separate container to brush on the salmon. Set the rest aside for the salad.


For the Salmon:

4 salmon fillets, each about 4 to 6 oz.

1/2 cup of lemon tahini dressing from above recipe

2 teaspoons  sesame seeds

2 teaspoons black sesame seeds

2 teaspoons dried dill

1/2 teaspoon salt

1/4 teaspoon pepper


Mix sesame seeds, dill, salt, and pepper together in a small bowl. Liberally brush the salmon fillets with the dressing to coat well. Discard any unused dressing that has come into contact with the brush. Sprinkle the seed mixture evenly over the salmon. Bake 15 to 20 minutes until fish flakes up with a fork and looks a solid, lighter pink – not a gelatinous red.


When the salmon is done, toss the greens with enough dressing to coat well. Divide the dressed salad onto four serving plates or one huge platter. Place drained pickled red onions, sliced radishes and seeds on top of the greens. Nestle the salmon fillets on top the salad and dig in.


Save To Pinterest

Fancy Doughnuts in a Plain World: “Amish Crack”

When Allison came home after spending a day in Northern Indiana doing research for an article she is writing about the Amish community and the RV industry, she told me she had sampled the best doughnut of her life. She said the locals call them “Amish Crack” because they are so delicious and addictive. I’m not a baker; most of my cooking involves dishes that are tasty – but fast! (Visit the Yates Yummies blog) Roy always laughs and says everything I make takes 15 minutes tops, so I’m not geared to the patient process of waiting for dough to rise. Plus I lack a basic understanding of the chemistry aspect of baking. However, after Allison found a post on Finding Harmony Blog that documented the author’s attempts at duplicating Rise’n Roll Bakery’s Cinnamon Caramel Doughnut, I had a desire to join in on the search for a recipe. What a wild ride! After several attempts I managed to cover every surface of my kitchen with a thin layer of flour and/or confectioners sugar and had some spectacular failures (think rock hard or envision a tire deflating).   I’ve documented what I learned below, along with the recipe I finally settled on. If anyone out there tries it, I would love to hear feedback! Likewise, if there is a better recipe for these delicious morsels, please share! To print out the recipe, scroll down to the bottom of this post and click on the “button”.

Just a quick aside – above and below are photos I took in 2015 while visiting Amish Acres in Nappanee , an attraction/museum dedicated to preserving historic buildings of the early Amish settlers in Indiana.

We spent three days in Nappanee while our motor home was being serviced at the Newmar Corporation. We were able to take a factory tour and experienced a bit of cognitive dissonance watching hustling Amish workers string yards and yards of electrical wires onto the RVs being built.

We also traveled to Shipshewana (above left, and right) and LaGrange (above lower photo right). Except for the slow moving vehicle sign in the back, seeing the horse and buggies is like going back in time.

The Amish try to keep their old ways while living in the modern world…

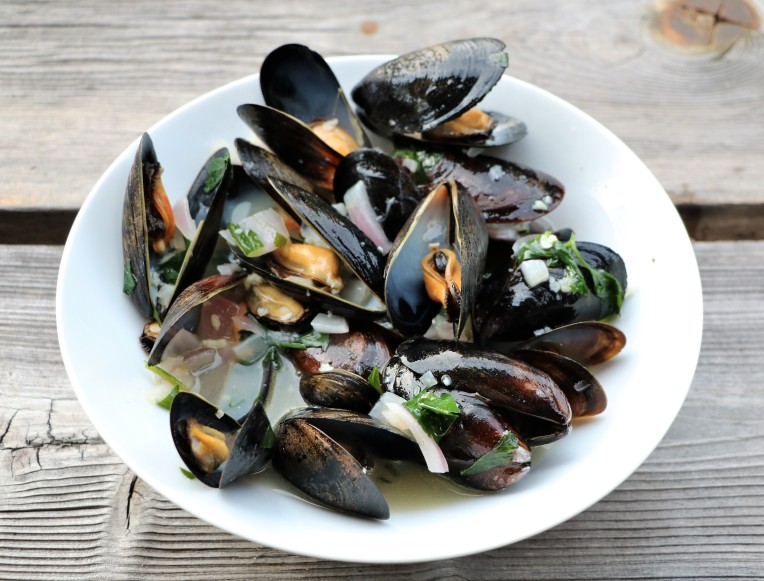
But let’s talk about the legendary doughnuts.

The Dough:

In the comments on the Finding Harmony Blog post, several people stated that they felt like potato was the secret ingredient needed to make the fluffy doughnuts. First I tried yeast-less potato dough, then potato dough with yeast. I also gleaned ideas from this recipe for Amish Doughnuts.

Here is what I learned:

  1. Resist the temptation to use a food processor to mix potato dough. The less handling the better or else the doughnuts will be dense, not fluffy. I realized that if I let the potato “melt” into the yeast water and then added it to the flour mixture, I could combine all the dough ingredients together with a fork.
  2. Grease the parchment paper that cut-out doughnuts are laid to rise on, or else they stick like crazy.
  3. Too long a second rise time made the doughnuts puff up so much the hole closed and when I tried to move them off the paper, they deflated. I fried a couple anyway and now I know why doughnuts need a hole; the middle stays raw when the outside is done.

The Caramel Glaze:

The Finding Harmony Blog post included two possible caramel glaze recipes; one used brown sugar and the other white sugar from the cook book Homemade Doughnuts: Techniques and Recipes for Making Sublime Doughnuts in Your Home Kitchen by Kamal Grant (Quarry Books, 2014). The white sugar recipe was tricky since it involved heating the sugar to caramelize it, but the flavor was truly superior.

Here is what I learned:

  1. The white sugar turns to burnt sugar very quickly once it starts to change color. Err on the side of caution and pull it off the heat sooner than later. It is tricky.
  2. When caramelizing the sugar it will turn into a hard ball when other ingredients are added to it. After searching for information on how to correct it, I found a What’s Cooking America post that advised adding a drop of lemon juice to prevent the problem.
  3. However, while the drop of lemon juice improved the situation, it didn’t entirely prevent all of the water/sugar mixture from hardening up on my stirring spoon and in the bottom of the pan. I found that heating the cream up in the microwave for 20 seconds so that it was warm, but not curdled, helped a lot.

So here’s the recipe that resulted from all my experimentation:

Amish Crack Doughnuts – Yields About 2 Dozen Doughnuts

Ingredients

For Dough:

1 (around 10 oz.) potato

4 cups water

4 cups all-purpose flour

2 cups self-rising flour

1/2 cup sugar

1 tablespoon salt

3 eggs

1/2 cup shortening (such as 1/2 of a Crisco Baking Stick)

2 packages yeast

Large bottle of vegetable oil (about 24 oz.)

Extra self-rising flour for rolling out dough

Ingredients for Caramel Glaze:

1/4 cup granulated sugar

2 tablespoons water

1 drop lemon juice

3/4 cup of butter

1/4 cup heavy cream

1 teaspoon table salt

1 teaspoon vanilla

1 cup confectioner’s sugar

Ingredients for Cinnamon Powdered Sugar

2/3 cup confectioner’s sugar

1 tablespoon cinnamon

Directions for Doughnuts:

Add the Peel and cube potato. Place in sauce pan with 4 cups water. Bring to a boil, reduce heat to medium, and cook for 15 minutes or until tender. Drain the potatoes and reserve the cooking water.

While the potato is cooking combine the all-purpose flour, self-rising flour, sugar and salt in a large bowl.

When it has cooled down to a warm but not hot temperature, place two cups of the potato cooking water in a medium sized bowl and pour the yeast over the top of it. Let it sit for 5 to 10 minutes until it looks smooth but foamy. Give it a stir.

Use a ricer or push the cooked potato through the holes of a colander. Don’t worry if the potato just ends up being mashed. Add the riced or mashed potato to the yeast water and give it a stir. The potato will sort of dissolve and disintegrate into the water.

Melt the shortening and allow to cool slightly. Whisk the eggs together.  Add the melted shortening, whisked eggs, and yeast/potato water to the flour mixture and store with a fork until it is combined. Don’t knead.

Grease the inside of a very large bowl with shortening or butter. Place the dough in the middle and cover with a tea towel. Allow to rise until double. This can take a couple hours, depending on how warm the room temperature is.

After the rising period, punch the dough down and place on a self-rising flour covered surface or pastry cloth. Knead just a couple times, then roll out to a 1/2 inch thickness. Using either a doughnut cutter or a glass turned upside down that is about 3 1/2 inches in diameter, cut out doughnuts. (If using a glass, cut holes out of the middle with an empty spice bottle or something similar.) Place the doughnuts on a baking sheet that has been covered with well greased foil or parchment paper. Cover with tea towels and let rest/rise for 1/2 hour.

Pour the vegetable oil in a large sauce pan. Heat to between 360 and 375 degrees. If working without a candy/cooking thermometer, the oil will be ready when it shimmers and a doughnut hole is surrounded by simmering bubbles when dropped in.

Fry 3 to 4 doughnuts at a time, about 2 minutes on each side. They will be lightly browned. Place cooked doughnuts on cooling racks which are on top of paper towels.

While the doughnuts are still warm, dip them into the Caramel Glaze (recipe below). Finish them off by placing the Cinnamon Confectioner’s Sugar (recipe below) in a fine mesh strainer and giving each doughnut a dusting.

Directions for Caramel Glaze

Cut the butter up into small cubes and set aside. Place the sugar and water in a small sauce pan. Stir to combine then place over medium heat and allow to simmer/boil without stirring for around 7 to 10 minutes until the mixture browns but doesn’t pass to the burning point. Do not walk away from the stove! It takes a while to get it going, but once it gets to a golden brown color, it quickly goes to burning. Once it is golden brown, remove the pan from the heat. Heat the cream in the microwave for 20 seconds so that it is warm, but doesn’t boil or curdle. Whisk the warm cream, a little at a time, into the sugar syrup. Add the butter, a little at a time, while continuing to whisk. Whisk in the confectioner’s sugar, salt, and vanilla until the mixture is smooth.

Direction for Cinnamon Confectioner’s Sugar

Place the confectioner’s sugar and cinnamon in a small bowl and stir until blended together.


An American’s Observations of Some Charming Cafes in Australia and New Zealand

cafe-pic

As an American “mum” visiting two of my daughters in Australia and then traveling on to New Zealand, I was prepared to see lots of beauty. However, I couldn’t help but be awed by the cafe culture. What I expected was an abundance of places that served tea to middle aged ladies wearing hats. Those existed too, but what actually seemed to be more plentiful were establishments that not only served coffee (and tea) but also innovative food. I shouldn’t have been so surprised since my daughter Allison had written an article about Navigating Australian Coffee Culture as well as posted some fabulous photos featuring Melbourne cafe culture on her  entertaining blog Naptime with Yasmine. There is no substitute for real experience though, and I came away with a few observations as well as a craving for a bliss (protein) balls. Those little morsels were seen nestled among the sweet offerings in several cafes. A recipe for Almond Butter Bliss Balls is given below; they are not too sweet but still delicious, and ingredient proportions can be played around with to suit individual tastes.

First of all, I was blown away but the sheer number of cafes.

street-cafes

Each of the smaller bergs we passed through in our rented car had a least one really cute cafe. In bigger cities, there seemed to be multiple coffee shops literally side by side. In contrast to the U.S., each tiny shop had its own unique individuality and style. Some major themes seemed to emerge – “shabby chic”. “retro ’50’s” or “Euro new age”. Turquoise seemed to be a favored color, but another prominent decor scheme was white paired with gleaming stainless steel adorned with potted succulents.

coffee-cups

I LOVED the coffee cups. Probably the correct term for them is cappuccino cups. What ever they are called, I ordered a set of colorful ones from Amazon when I got home. Of course, I had to have one in turquoise.

img_2814

They serve lattes in a glass.  Does anyone know why?

At one point I just ordered a regular coffee. The waitress looked confused.

“Mom, you can’t do that here”, my daughter Jennifer explained.

What? It turns out that each coffee is built from espresso. An “American” cup of coffee would have to be made by adding a lot of hot water to an espresso shot. In addition to that, since each order is individually made, be prepared for a long wait in line if the cafe has only one barista working one machine.

img_3258

So, what goes with a cup of coffee? If it was ten in the morning or mid afternoon, I’d go for a sweet. Bar cookies or sheet cakes are called “slices”.  Often seen with fruit filling and crumble topping, they were absolutely over the top tasty! But so was everything else, even the “biscuits” (cookies to Americans).

savory-cafe

If it was breakfast or lunchtime, the savory food served in the cafes was scrumptious. Even a small town cafe could be counted on to offer fresh, high quality dishes. No bagels or fried food were in sight. Always on hand were carafes of water and a supply of small glasses that patrons could help themselves to.

The following photos show just a few of the cafes we encountered.

img_2926

Sonido! South American Cafe  69 Gertrude St, Fitzro, Melbourne

Very close to the Melbourne Museum.  Make sure to get there before the kitchen closes at 3 pm.

img_3000

Porcelain 149 Elgin St, Carlton, Melbourne

Alright, this is really a tea parlor – but it has a special place in Allison’s heart, so I wanted to include it!

cafe-cubano

Coco Cubano 191 Oxford Street, Darlinghurst, Sydney

Wide glass doors open up to the street and patio seating. Inside, leather and wood provide a cozy atmosphere.

img_3859

26 on Ross 26 Ross Place, Lawrence, New Zealand

Delicious, high quality food in a tiny small town.


img_2809

Uncommon 60 Chapel St, Windsor, Melbourne

Very close to some interesting back alley street art. The bliss balls were out of this world and the inspiration for the recipe below.

img_3401

Chop House Arrow Ln, Arrowtown 9302, New Zealand

Just a wee bit hard to find, but the locals will tell you where it is! The food was first rate.

Recipe for Almond Butter Bliss Balls

fotorcreated

Ingredients for six bliss balls:

1/4 cup store bought almond butter

1/4 cup whole almonds

6 dates

2 heaping tablespoons cacao powder

1 tablespoon coconut oil

1/4 teaspoon coarse sea salt

1/4 teaspoon cinnamon

Use a food processor to pulse the almonds until they are like coarse sand. Don’t allow the ground almonds to become a paste. Place in a small bowl and set aside.

Remove the seeds from the dates and roughly chop them. Place the chopped dates, almond butter, cacao powder, coconut oil, salt, cinnamon and 2 tablespoons of the ground almonds in the food processor. Pulse until all ingredients are combined. Form resulting mass into six walnut sized balls. Roll each ball in the remaining ground almonds. They can be eaten immediately but they are even better after being refrigerated for a couple of hours.

Enjoy with a good cup of coffee!

bliss-balls


Another Printable Recipe Archives     fb     tweet (2)     pin     me     instagram_2016_icon

Guest Post: Naptime With Yasmine Makes Time For Melbourne’s Doughnut Time

allison-yates-doughnut-time-2

Editor’s note:  In 2016, my adventurous, world traveling daughter spent most of the year in Australia courtesy of a Working Holiday visa. Her never boring and often hilarious blog, Naptime With Yasmine , documents much of her experiences there.  Last month, Roy and I met up with her and one of our other daughters in Sydney, and then traveled on to Melbourne. While walking around the city, I was enchanted by the window display of Doughnut Time. Besides looking absolutely delicious, the pastries displayed sported catchy little names such as “Yass Girl, You Sleigh” (red velvet with candy canes) and “O Holey Night” (Christmas cream glaze with festive sprinkles). But do they taste as good as they look? Here’s the scoop from Yasmine – but you can call her Allison.

________________________________________________________________________________

Make Time For Melbourne’s Doughnut Time

allison-yates-doughnut-time-5

Look through Doughnut Time’s Instagram . Do yourself a favor and open it now. It’s enough to make me want to jump out of my balcony, into the street, and sprint right down to Degraves Street in the CBD and spend another $6 to satisfy this demanding craving that’s plagued me since the first moment one of their doughnuts grazed my lips.

Doughnut time has become a massive craze. Its hashtag is everywhere, dominating Twitter and Instagram. The line is always out enormously long. Walking past the store, there are, without fail, hordes of young girls instagramming pictures of chocolate filling spewing out of the crispy pastries.

allison-yates-doughnut-time-6


allison-yates-doughnut-time-7

So, if the concept of doughnuts isn’t new, what makes Doughnut Time so special? In an age of nutrition-obsessed, health-conscious consumers, how can a doughnut shop not only survive, but thrive? How can a chain go from one store in Brisbane to selling in over 15 locations just a few months later? The publication Time Out Melbourne even listed it as some of the best doughnuts in all of the city. After resisting for months buying what I claimed was an overpriced item to only make me fat, I finally caved. I set off to find out.

allison-yates-doughnut-time-8

They refer to their donuts as “works of art.” And aren’t they, though? Their website  features an array of unique creations with cheeky names and equally impressive ingredients. They have doughnuts called “The Gluten that Got Away,” “The Ed Sheeran,” and “Glazed and Confused.” Unfortunately their current menu doesn’t include those, but I opted for one that satisfied both my need for a trendy name and my chocolate craving. I didn’t leave disappointed.

I arrived at the Melbourne CBD location on Degraves Street, just a few meters from Flinders Street Station around 1:00pm, ready to take the plunge. I waited in line behind five people, but not for long. Within seconds I was at the front of the line, chatting with the two teenage girls behind the counter. “I’ll have the Zero Chills,” I said. The name of the doughnut I chose (butterscotch glaze topped with Hershey’s kisses and crushed Oreo), a popular slang term to mean that I “do what I have to do,” seemed fitting for the occasion.

allison-yates-doughnut-time-3

They packaged my doughnut in a light blue, retro-inspired takeaway box that had, “Honey, I think it’s time. Call now” and “It’s always a good time” written on the side.  It’s as if they were mocking me for holding out for so long. They knew I couldn’t be kept away forever.

allison-yates-doughnut-time-4

On my way to devour my doughnut in Federation Square, I stopped by 7/11 for some cheap coffee (it’s not even as bad as they say it is). After all, who can afford a $6 doughnut and coffee as expensive as it is in Melbourne ?

I took one bite. The outer edge of the doughnut had a slight crunch, but the inside was moist, fluffy, and utterly irresistible. I smeared chocolate all over my face. I licked my lips and dropped pieces of the butterscotch glaze all over my shirt. I felt full and slightly sick after my third bite, but I didn’t let that get in the way of me finishing the entire thing. I had zero chills about what other people thought. I was enjoying a special moment with this insanely sugary, insanely expensive, but insanely breathtaking dessert.

So, I asked myself again, what makes Doughnut Time so special? It’s the taste for sure. It’s absolutely about the quality. But most of all, it’s about having a fast-food, chic, hole-in-the-wall (literally) doughnut shop that gets us. They know their consumers. We want to have aesthetically pleasing desserts to Instagram and hilarious names that make references we understand. We want to frequent a place that thinks of combinations and creations that are close to home and familiar but widely unheard of and somehow still tantalizingly rare. We wanted it, and we found it. At least I did, anyway. Me and 11,000 other followers.

On that note, please excuse me. It’s Doughnut Time.

________________________________________________________________________________

naptimewithyasmine-photo1

All photos taken by Allison Yates

Please visit the insanely entertaining Naptime With Yasmine , a blog that focuses on people, travel, and living and working abroad with a sense of humor and a social conscience. She is a traveler, but also a feminist and advocate, questioning the impact of her presence and the implications of her actions abroad.

My personal favorite posts have to be the great stories she tells about the year she lived in Ibiza, Spain.

As Allison says, “Have a meaningful, and most importantly, entertaining life.”

What We Ate When We Went West

image

Being from the Midwest, I had no idea how beautiful the western part of the United States is. I had visited California and Colorado before, but they were short trips with a busy schedule. This summer Roy and I had the opportunity to explore this area of the country in a motor home and of course, one of our goals was to investigate the food! This post highlights what we found; I’m sure I’ve only hit the tip of the iceberg, so please let me know what I’ve missed in the comments below.

 Bison and Elk

image

I had my first taste of bison (photo above, left) at the Cowboy Cafe in Medora, North Dakota. Medora is a cute little touristy town right at the entrance to Theodore Roosevelt National Park. I was a lot more excited about the park than I was about that bison burger! Bison meat has less fat than chicken and fewer calories. I figured that was why it tasted so dry. But I didn’t give up! Each time I found it on a the menu, I’d give it a try. Some bison burgers were tastier than others. The best one I found was at Wall Drug in South Dakota. We also sampled elk burgers made for us by our friends Jim and Carol in Missoula, Montana. They were delicious (Carol is a great cook) and really not that much different than hamburger. However, our best bison experience was when we grilled a bison tri tip steak which we bought at Specialty Cuts Meat Market in Columbia Falls, Montana. In the West, beef tri tip is a common cut rubbed with dry spices and cooked up Santa Maria style which I tried to mimic. I used what spices I had on hand, and bragging aside, it was delicious!

Bison Tri Tip Steak

Ingredients for Four Large Servings:

Tri tip steak close to two pounds (about one inch thick)

4 cloves garlic, peeled and put through press

1 tablespoon kosher salt

1 tablespoon olive oil

1 1/2 teaspoons thyme

1 teaspoon pepper

1/2 teaspoon marjoram

Directions:

Combine the salt, garlic, olive oil, thyme, pepper, and marjoram together to make a paste. Rub it into the steak, covering all sides. Allow the steak to sit (with the rub on) until it comes to room temperature. Heat the grill up to high temperature. Sear the outside of the steak by cooking each side on high for 2 minutes. Then, turn the heat down to medium low and cook 9 minutes a side for medium well. Tri tip has sort of a rectangle shape, so the ends of the steak will be well done and the middle inside will be pink. After taking the steak off the grill, let it rest on a covered platter for 5 to 10 minutes. Then slice the steak against the grain and enjoy!

Huckleberries

image

Smaller than a blueberry and a bit more tart, huckleberries are a big deal, especially in Montana and nearby Idaho.  They are good in everything that blueberries are, but perhaps because there is a short window when they are in season, they are found in a lot of packaged food as well.  We enjoyed them in ice cream, chocolate sauce, and even taffy.

Jerky

image

Not just beef jerky, but a multitude of different meats and flavors such as teriyaki turkey and jalapeño bison are available. In the Midwest, I’ve seen this stuff in sporting goods stores or Walmarts, but I have never seen anyone buy it.  Out west, everyone seems to have it in their grocery cart. It’s a great snack that doesn’t have to be refrigerated, so for car trips it’s handy – especially since every destination is so spread out from the next one. On the plus side, jerky consists of protein, but the down fall is the high sodium. However, since these strips of dried meat take an eternity to chew, not many can be eaten at one sitting!

Traditional Dishes Passed Down From Immigrants

image

Thousands of immigrants came to settle the West due to the Homestead Act of 1862 and the railroads. Their lasting influence is felt in various Irish pubs, German restaurants, and Italian produce companies in the region. Our friend Carol is of Norwegian descent. Her ancestors came to Montana via Minnesota. She belongs to The Son’s of Norway and I was thrilled to see her and other members make a traditional Crown Cake (Kransekake). It was evident that Carol and her dear friends Tolly, Susan, and Betty had a wonderful time doing this labor of love together. This time consuming celebration cake is served at milestone events such as weddings and graduations.

image

Rings of batter consisting of ground almonds, sugar, and egg whites are  baked in special form pans. Then they are stacked 18 high,  held together with royal icing, and decorated with Norwegian flags and candy. As you can see from the photo collage above, there are many different recipe versions; some use almond paste while others include more than just the three basic ingredients. I got to taste a baked piece of a ring that broke while it was being removed from the pan. It reminded me of a macaroon cookie and was delicious.

Huge Candy Stores Where the Star of the Show is Licorice

image

We encountered huge candy stores such as the one in Arlee, Montana above. I never knew there could be so many different kinds of licorice – including huckleberry!

Trout

image

While in Denver, we met up with our old friends Jerry and Helen.  Roy and Jerry have a hilarious fishing history which they managed to continue during our visit. I won’t go into it here, but I will say tears of laughter streamed down my face when they came back after hours of fishing with a grocery store bag full of trout. At least they were cleaned and gutted! Helen cooked them up using the foil packet method and the results were scrumptious!

Helen’s Colorado Trout

Ingredients for Four Servings:

4 trout- about 2 pounds, gutted and cleaned

4 pieces of heavy duty foil, each about 12 by 24 inches

1 pint cherry tomatoes, cut in half if large

1/2 medium yellow onion, peeled and diced

4 tablespoons butter

1 teaspoon seasoning salt

1 teaspoon lemon pepper

1 teaspoon garlic powder


Directions:

Mist each piece of foil with cooking spray and place a trout in the middle. Sprinkle 1/4 teaspoon seasoning salt, lemon pepper, and garlic powder over each fish. Evenly sprinkle the cherry tomatoes and diced onion among each fish. Top each one with a tablespoon of butter and seal the packets tightly. Either bake in the oven or place on a gas grill at 400 degrees heat for fifteen minutes, turning once in the middle of the cooking time.  The fish should flake easily with a fork when done.

Green Chiles of Colorado and New Mexico

image

We hit Pueblo, Colorado just in time for the annual Chile & Frijoles Festival. Contrary to what Midwesterners think, this event doesn’t celebrate a ground beef and tomato sauce concoction, but rather dried beans and green chilies. Huge bags of mirasol chilies are carried over by fork lifts to roasters that resemble those devices that turn raffle tickets. Only these are huge baskets that flame up and smoke the chiles. People line up to get huge plastic bags full of the roasted chiles which they take home and divide into freezer bags to last them until the Chile Festival next year.image

The signature dish in Pueblo is the slopper, shown above left. An open face cheeseburger is covered with a sauce made from green chiles and sprinkled with chopped onion. It also comes with red chile sauce which is a less spicy version. We sampled one at Grays Coors Tavern, an iconic place that was started by the Coors company to promote their beer. It’s only changed hands a couple of times and it’s full of character. Lots of families were sitting in booths along the wall watching the Broncos play and there is outdoor seating as well.

New Mexico is know for bring a bowl of both green and red chile (sauce not the stew) to the table. A few years ago when we were driving across the country to California,  Jenny and I found their brand of Tex Mex food as enchanting as the terrain. We are headed there next, and I’m looking forward to Sopapillas drenched with honey! Anyone have any recommendations?

Please communicate!

Another Printable Recipe Archives     fb     tweet (2)     pin     instagram_2016_icon     me

Beautiful Off-season Ibiza and Some Traditional Dishes

DSCN9090

This is the final post in a series about our trip to Spain to visit Allison. The other two, “Manneqins, Markets, and Tortilla Espanola” & “Reminiscing about Coffee in Spain” gave me a chance to use some of the photos I snapped, but also to remember how much I enjoyed that vacation. At the end of our trip, we wound up in Ibiza, one of the Balearic Islands in the Mediterranean Sea off the coast of Valencia. Allison was based there at a school that participated in the English Language and Culture Auxiliary Program. She was also working as a nanny for the only child of a very privileged family. Both experiences made for some interesting and outrageous stories. Her blog, Naptime With Yasmine, recounts some hilarious tales about her time there.  One thing that she immediately noticed about Ibiza was the curious fact that it has two different personalities…

FotorCreated 5

The photos above are indications of what most people come to Ibiza looking for. During the “Clubbing Season” it grows from a population of a 180 thousand to 1.2 million people. Clubs with names like Cream, Cocoon,  Privilege, Amnesia, and Space open up from at the end of May through the beginning of October. People from Europe, especially the UK, flock to party and soak up the sun on the beaches. AOL and other sites have reported on tourists’ shenanigans that take place there. However, since we were visiting in April, our experience was very different.

DSCN9070

We didn’t find too many sun worshipers on the beach in Ibiza Town. In fact, it was easy to get around and sometimes the city almost had a deserted feel to it.

FotorCreated 2

We were able to amble around Dalt Vila, Ibiza Old Town without fighting any crowds. The walls surrounding it date back to the 1500’s and it is a UNESCO World Heritage Site.  Phoenicians, Carthaginians, Roman’s, and Moors each had a period of occupation on the Island. In 1715 King Philip V absorbed it into Spain. In more modern times it became a place of peace, love, and living off the land when Hippies descended on it in the 60’s. These days it has morphed into a tourist destination for those who like to party. I wonder if some of the offspring from the Hippies grew up and became club owners? Just speculating!

FotorCreated 3

Santa Maria Cathedral in Old Town is worth seeing and there are lots of interesting shops as well.

FotorCreated 6

But what I really enjoyed is the alter ego of Ibiza; the raw unspoiled beauty of the island is in complete juxtaposition with the glamorous material lifestyle of clubbing.  Allison is an avid hiker, and she guided us to some breathtaking views. The huge rock in the lower right of the photo collage above is Es Vedra. Reported to be one of the most magnetic places on earth, some say below it lays the lost city of Atlantis.

DSCN9051

Further highlighting the Island’s dual personalities was our experience of eating at two very different restaurants that basically had the same menu. The first one, extremely expensive Es Nautic in San Antonio, was suggested by the mother of the girl Allison au paired.  It was located next to the harbor in which the family kept their sailboat. Typical to what Allison had relayed to us about the mom’s behavior, she packed her daughter in the car with us, and sent us on to the restaurant even though it wasn’t a scheduled babysitting time. Of course, she did not send the little one with any money, so we footed her portion of the bill. We rationalized that observing the girl’s behavior was worth it as she plowed through eating more than her share of the family style servings. Es Nautic had a beautifully appointed dining room. The table setting was lovely and the presentation of the food was fabulous. The second restaurant, El Bigote in Cala Mastella, was quite a different venue. It is shown in the photo above. This outside eatery with the most remarkable view has two servings everyday and all patrons are served the same dishes cooked right in plain sight on an open fire. The girl was with us for this meal also; this time she ate a bit more modestly. Apparently she suffered some stomach problems after the first experience! We ordered just about the exact same tradition Ibicenco dishes from both restaurants. The food photos were taken by me but the photos of the recipes are all from www.Ibiza.Travel .

DSCN9059

Both restaurants brought bread, olives and aioli to the table. The bread alone was very bland, but it was fantastic with aioli spread on it! The olives were the perfect complement to that bread combo.

Allioli

FotorCreated

On the left above is Es Nautic’s rendition of the fish stew, Bullit de Peix. On the right above is El Bigote’s version and right below shows how it was cooked. The dish gets its orange hue from saffron. Delicious rice served after diners eat this main dish and is prepared in the cooking broth left behind from the fish. Notice how Es Nautic’s is served with aioli poured over it. In both restaurants the fish still had tails, tentacles, and all still attached!

Bullet fish and rice

DSCN8829

The dessert above is Greixonera from Es Nautic. It was pretty good, but not as good as Allison’s favorite Ibizan sweet, Flao. Flao is a goat cheese tart laced with mint; the recipe for it is in the Spanish coffee post mentioned above.

Ibiza dessert

So which restaurant did we like better? It’s hard to say! Both are very authentic to Ibiza; one reflects the pampered life and one showcases the natural beauty of that part of the world. The fact is – I would go back to either one of them in a heartbeat!

Another Printable Recipe Archives     fb     tweet (2)     pin     inatagram     me